
 If at all you want to have the best use of your vacuum cleaner for a long period of time, then you must learn how to clean dyson stick vacuum as an expert. This would definitely safe you from making a lot of expenses.
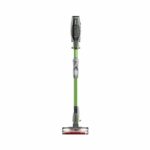
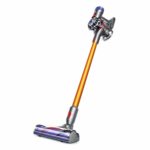
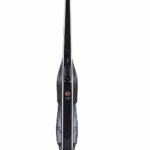
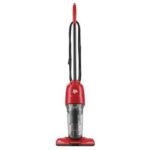
Dyson stick vacuum models, on the other hand, are cordless. And, just as you can use this information to clean cordless stick vacuum cleaner so likewise can you use it for cleaning corded vacuum cleaner also.
All you just have to do is to understand the structure of the vacuum cleaner that you’re using. You can even check out the manual so that you’d be pre-exposed to the instructions that are provided by the manufacturer before using them.
Nonetheless, on this platform, we’ll be providing you with 8 steps that you can practice in cleaning your stick vacuum cleaner.
The information is factual and succinct, so you can depend on it for cleaning vacuum cleaners made by other brands also:
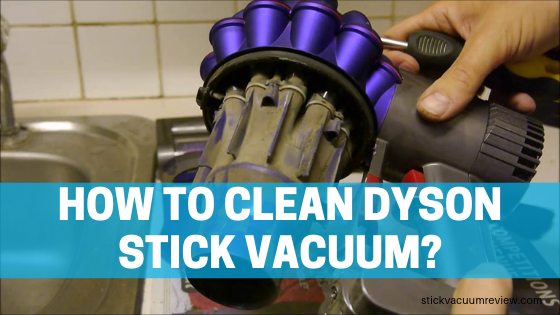
8 Things to Consider about How to Clean Dyson Stick Vacuum?
1. Preparation
- You might need to get a scissor available first and probably identify the components that the stick vacuum you’re using has.
- Also, make sure that you wait until the unit is cooled before you begin its use.
- Get a bucket of warm water, a clean cloth, and a detergent available also.
- You might need to move all these to an enclosed area that you wouldn’t mind if at all it gets wet.
- Provided you’re not using any of the Dyson’s product, then you might need to read the manual first before you begin to clean.
- Once all those are done, then you can move over to the next step.
2. Detachments
Dyson cordless vacuum cleaners don’t comprise of hose but stick. Nonetheless, you can imply the same strategy if your unit has any of these.
All you just have to do is detach the accessories together with the stick from the unit. You might need to be discreet and meticulous while you’re doing this so that there won’t be cracks.
Just make sure that there’s an empty bucket that you’re filling it with. In addition, make sure you use a paper tape to join regions that are dented on either the stick or the hose that you’re using so that the cleaning would be apt.
3. Cleaning: Step 1st
- Get rid of the dirt in the bin and ensure that the bin is not returned into part that you took it from immediately.
- Remember the accessories that you removed in the first place, it’s time you dust off the dirt that’s attached to them.
- Remove also the filters and get them dusted. Please, note that the best place to get this done is in an opened area outside your house. This would prevents you from littering the whole vicinity from becoming messy.
- Make sure that while you’re doing this that the units are maximally arranged and assembled in an area that one would easily get hold of them.
- Provided you’ve done all that, then you can move on to the next step.
4. Cleaning: Step 2nd
Add the detergent inside the warm water and stir. Once it has become foamy, you can then immerse your towel that’s lint-free so as to get it soaked.
Nonetheless, squeeze the cloth once you remove it from the soapy water so as to make it damp.
Also, use the brush to cut off the yarn/fur and other unnecessary attachment on the accessory. You could do this before you begin to clean further, why? So that your workspace won’t become messy.
Then, when you’re done, you would have to sweep the environment so that it would be clean at least before water start splashing on the ground.
5. Cleaning: Step 3rd
- It’s at this point that you’d have to soak in the bins and the filters inside the soapy water use the lint-free cloth to clean the interior and exterior.
- Make sure that no stain is found once you’re done scrubbing it. Do this until you’re satisfied with the transformation.
- Afterwards, you can immerse it in clean water so as to easily remove the soap.
- Now, get a clean dry cloth and use it to wipe off the dabs on the surface off the filters and bin that you’re using.
- Apart from the filter and bin, don’t immerse any other part in the water but use a damp cloth to clean the surfaces.
6. Coupling
Once you’ve found out that the removable parts are completely dried, then begin to couple the unit onto each other.
Of course, this step is easy based on the fact that you can “reminisce” the method you used in detaching the components. Or, you can even decide to use the depiction on the manual as a guide in coupling it.
7. Safety Precautions
- Make sure that the motor part is neither soaked inside the water or splashed water upon.
- Make sure that you only begin to wash the vacuum when the machine is cooled.
- Always prevent water from touching the part that their batteries are designated.
- Make sure that you clean the unit according to the manufacturer’s direction.
- Clean with gentility and prudency.
8. Repetition
Imbibe the directions that are provided on this platform and get the best use of the vacuum. As a matter of fact, doing this again continually so as to elongate its use.
Final Verdict
Optimize your chances of getting the best use of your product by using this article. This article enumerates the 8 steps that how to clean dyson stick vacuum an individual can effectively. The steps are practical and are comprehensible. It’s just one that you can rely upon.
